


In today’s rapidly evolving tech landscape, deploying applications in a scalable, reliable, and efficient manner is crucial. There are numerous options available for deploying web applications, each with its own set of benefits and trade-offs. Popular choices include traditional hosting providers, Platform-as-a-Service (PaaS) offerings like Vercel or Heroku, and container orchestration platforms like Kubernetes.
Why Choose Azure Container Apps?
Azure Container Apps stands out as a robust option for deploying containerized applications, particularly for those looking to leverage the power of serverless architecture combined with containerization. Here are a few reasons why you might consider deploying your application as a container app on Azure:
- Scalability: Azure Container Apps automatically scales your applications based on incoming traffic, ensuring optimal performance without manual intervention. This serverless scaling is ideal for handling variable loads efficiently.
- Flexibility: Containerization allows you to package your application along with its dependencies, ensuring it runs consistently across different environments. Azure Container Apps supports any application that can run in a container, providing tremendous flexibility in deployment.
- Integration: Azure Container Apps integrates seamlessly with other Azure services, such as Azure Monitor for logging and monitoring, Azure Key Vault for managing secrets, and Azure DevOps for continuous integration and deployment (CI/CD).
- Cost Efficiency: With a pay-as-you-go pricing model, you only pay for the compute resources you use, making it a cost-effective solution for deploying applications of all sizes.
- Managed Environment: Azure Container Apps abstracts away much of the underlying infrastructure management, allowing you to focus on developing and deploying your applications without worrying about the complexities of managing servers.
Overview of the Deployment Process
In this guide, you will walk through the process of deploying a Dockerized Next.js application to Azure Container Apps. This approach combines the modern capabilities of Next.js with the powerful containerization and serverless deployment features of Azure Container Apps. By the end of this guide, you will have a fully deployed Next.js application running in Azure cloud.
Creating a Next.js Application
In this section, you’ll create a new Next.js project to serve as the foundation for your deployment. You’ll use the npx create-next-app@latest command to quickly set up a Next.js application and ensure it’s running correctly on our local machine. Ensure that you have NodeJS installed on your system before proceeding with the instructions.
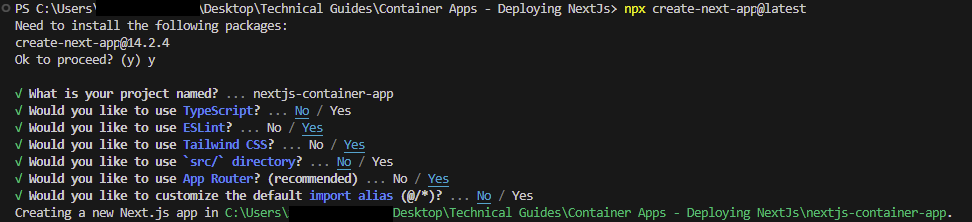
- In your terminal, navigate to the directory where you want to create your Next.js project and create a new Next.js project by running the following command:
npx create-next-app@latest - Select the following information to finish creating the project:
- Navigate to the newly created Next.js project directory using the following command:
cd nextjs-container-app - Open the project in VS Code by running the following command when in your project directory:
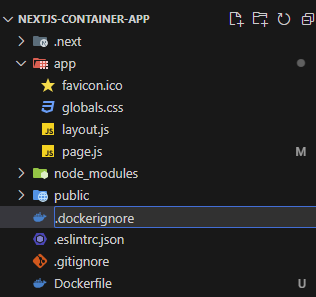
code . - Click on page.js in the app directory:
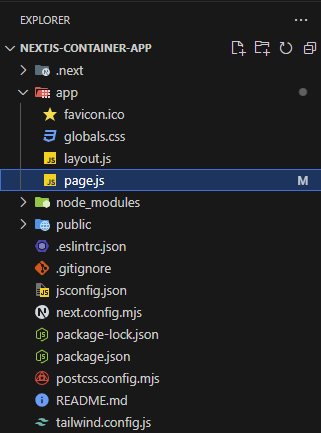
- You will create a simple To-Do list app to deploy to your Azure Container App. In page.js, paste the following code:
'use client' import { useState } from 'react'; export default function Home() { const [task, setTask] = useState(''); const [tasks, setTasks] = useState([]); const addTask = () => { if (task.trim() !== '') { setTasks([...tasks, task]); setTask(''); } }; const removeTask = (index) => { const newTasks = tasks.filter((_, i) => i !== index); setTasks(newTasks); }; return ( <div className="min-h-screen bg-gray-100 flex items-center justify-center"> <div className="bg-white p-8 rounded shadow-md w-full max-w-md"> <h1 className="text-2xl font-bold mb-4">To-Do List</h1> <div className="flex mb-4"> <input type="text" value={task} onChange={(e) => setTask(e.target.value)} className="border p-2 rounded w-full" placeholder="Add a new task" /> <button onClick={addTask} className="bg-blue-500 text-white p-2 rounded ml-2" > Add </button> </div> <ul className="list-disc list-inside"> {tasks.map((task, index) => ( <li key={index} className="flex justify-between items-center mb-2"> <span>{task}</span> <button onClick={() => removeTask(index)} className="bg-red-500 text-white p-1 rounded" > Remove </button> </li> ))} </ul> </div> </div> ); } - Test your application locally by running
npm run devin the terminal. - In your browser go to http://localhost:3000 to see your application:
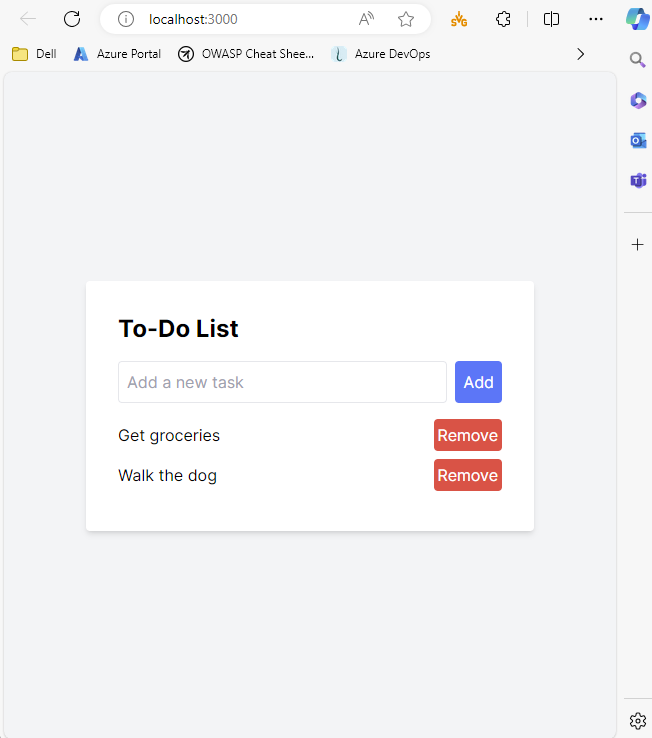
You’ve successfully created and run a basic Next.js application locally. This step ensures that your development environment is set up correctly and your application is ready for further development and deployment.
Dockerizing Your Next.js Application
In this section, you’ll package your Next.js application into a Docker container. Docker enables you to create isolated environments for your applications, ensuring they run consistently across different environments, whether it’s your local machine, a staging server, or in production.
By containerizing your application, you encapsulate all dependencies, libraries, and configuration files, which simplifies deployment and scaling. This step is crucial for deploying your Next.js application on Azure Container Apps, providing a reliable and efficient way to manage and distribute your application.
By the end of this section, you’ll have a Docker image of your Next.js application ready for deployment. If it’s your first time working with Docker, consider reviewing this article to get yourself familiar with Docker CLI and Docker Desktop.
Prerequisites
Before you begin, ensure you have the following prerequisites:
- Docker Installed: Make sure Docker is installed on your machine. You can download and install Docker from the official Docker website.In your terminal, run the following command to check if you have Docker installed:
docker -vThe output should look like this if its already installed:
Instructions to Dockerize Your Next.js Application
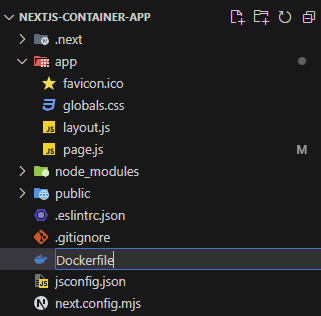
- In the root of your Next.js project, create a file named
Dockerfile:
 Check out Writing Dockerfile For The First Time for best practices.
 - Open the
Dockerfileand add the following content:# Use the official Node.js image as the base image FROM node:18-alpine # Set the working directory inside the container WORKDIR /app # Copy package.json and package-lock.json to the working directory COPY package*.json ./ # Install dependencies RUN npm install # Copy the rest of the application code to the working directory COPY . . # Build the Next.js application RUN npm run build # Expose port 3000 to the outside world EXPOSE 3000 # Command to run the application CMD ["npm", "start"] - In the root of your Next.js project, create a file named
.dockerignore:
- Open the
.dockerignoreand add the following content:node_modules npm-debug.log Dockerfile .dockerignoreDockerignore file is used to ignore the common files and folder that must not be included while building the docker project. This ensures clean build process with little unnecessary files/folders.
- In your terminal, navigate to the root directory of your Next.js project and run the following command to build the Docker image:
docker build -t nextjs-container-app .<aside> 💡 If you get the following error when building your Docker image:ERROR: error during connect: this error may indicate that the docker daemon is not running: Head "http://%2F%2F.%2Fpipe%2Fdocker_engine/_ping": open //./pipe/docker_engine: The system cannot find the file specified.Make sure you have the Docker Desktop app running.</aside>This command will build the Docker image and tag it as
nextjs-container-app - After the image is built, you can run a container using the following command:
docker run -p 3000:3000 nextjs-container-appThis command maps port 3000 on your host to port 3000 in the container. - Open your browser and navigate to
http://localhost:3000. You should see your Next.js application running inside the Docker container.
This container can now be deployed on Azure Container Apps or any other container orchestration platform. Next, you’ll move on to pushing this Docker image to Azure Container Registry (ACR) for deployment.
Pushing the Docker Image to Azure Container Registry (ACR)
Now that you have Dockerized your Next.js application, the next step is to push the Docker image to Azure Container Registry (ACR). ACR is a managed Docker container registry service used for storing and managing private Docker container images. By pushing your Docker image to ACR, you ensure that it is securely stored and easily accessible for deployment on Azure services, including Azure Container Apps.
In this section, you’ll learn how to create an Azure Container Registry, push your Docker image to it, and prepare for the final deployment step. This will streamline your deployment process and enhance the security and management of your application images.
Prerequisites
Before you begin, ensure you have the following prerequisites:
- Azure Account: You need an active Azure account. If you don’t have one, you can create a free Azure account.
- Azure CLI Installed: Ensure that the Azure CLI is installed on your machine. Follow Installing and Configuring Azure CLI for a complete guide.
Instructions for Pushing the Docker Image to Azure Container Registry (ACR)
- Log in to your Azure account:
az loginThis command will open a web browser window where you can sign in with your Azure account credentials. Once logged in, you can close the browser window.
- Create a Resource Group (if you don’t have an existing one):
az group create --name nextjsContainerApp --location eastusA resource group is a container that holds related resources for an Azure solution. The location specifies where your resources will be physically stored.
- Create an Azure Container Registry:
az acr create --resource-group nextjsContainerApp --name containerapp832 --sku BasicReplace
containerapp832with your desired registry name (it must be globally unique). The SKUBasicis suitable for development and testing environments. - Log in to your ACR:
az acr login --name containerapp832Wait for the command to run. You should see a Login Succeeded message in the terminal, indicating that you are authenticated with your ACR.
- Tag your Docker image:
docker tag nextjs-container-app containerapp832.azurecr.io/nextjs-container-app:latestThis tags your local Docker image with the ACR login server name, preparing it for upload.
- Push the Docker image to ACR:
docker push containerapp832.azurecr.io/nextjs-container-app:latestThis command uploads your Docker image to ACR.
- Verify the Docker image:
az acr repository list --name containerapp832 --output tableThis command lists the repositories in your ACR, verifying that your Docker image has been successfully pushed. You should see your repository in the output.
Example output:
Result
--------------------
nextjs-container-app
By completing these steps using the Azure CLI, you have securely stored your Docker image in Azure Container Registry. This image is now ready for deployment on Azure Container Apps or any other Azure services, ensuring a smooth and efficient deployment process. In the next section, you’ll learn how to deploy this Docker image to Azure Container Apps.
Deploying Your Docker Image to Azure Container Apps
Now that your Docker image is securely stored in Azure Container Registry (ACR), the next step is to deploy it to Azure Container Apps. Azure Container Apps is a managed serverless container service that enables you to deploy modern applications and microservices using containers. It provides built-in scaling, supports various programming languages and frameworks, and integrates seamlessly with other Azure services.
In this section, you’ll learn how to create and configure an Azure Container App, deploy your Docker image from ACR, and verify that your Next.js application is running in the cloud. This deployment process will ensure your application is scalable, reliable, and easy to manage.
Instructions for Deploying Your Docker Image to Azure Container Apps
- Create an Azure Container Apps Environment using the following CLI command:
az containerapp env create --name nextjsContainerAppEnv --resource-group nextjsContainerApp --location eastusThis command creates an environment for your Container App. Replace
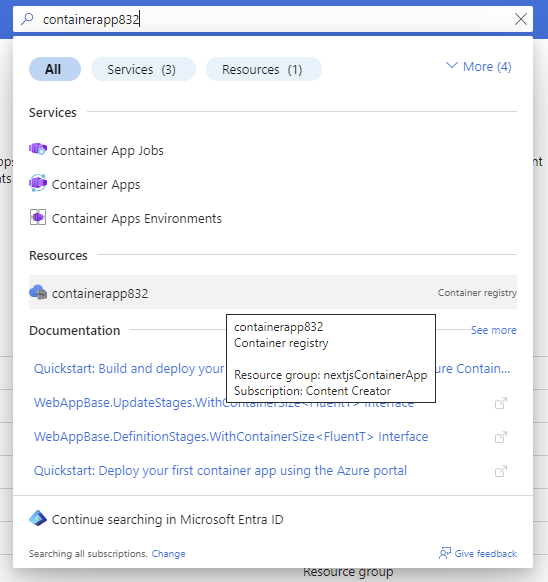
myContainerAppEnvwith your desired environment name. - To access the container registry Access keys, go to the Azure Portal search bar and type the name of your Container Registry. In this case, containerapp832.
- Next, navigate to the Access keys page and select the checkbox Admin user:
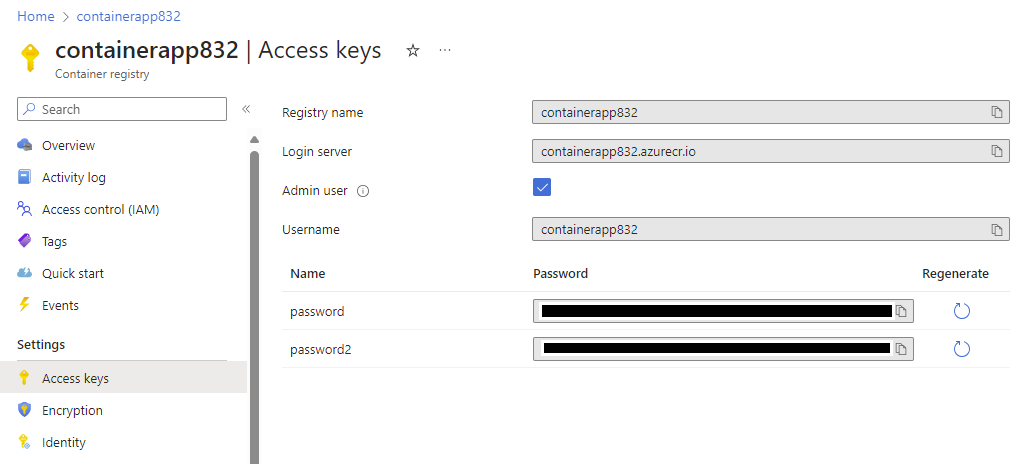 You will need the Login server, Username and password details from this page for the next step.
 - Create the Azure Container App using the following CLI command:
az containerapp create --name my-container-app --resource-group nextjsContainerApp --environment nextjsContainerAppEnv --image containerapp832.azurecr.io/nextjs-container-app:latest --target-port 3000 --ingress 'external' --cpu 0.5 --memory 1.0Gi --registry-server <Login server> --registry-username <Username> --registry-password <password>Replace <Login server>, <Username> and <password> with the details from Access keys page above.
This command creates a new Container App using the image from your ACR. Replace
my-container-appwith your desired app name. The--target-port 3000option specifies the port your application listens on. - Retrieve the Application URL using the command below:
az containerapp show --name my-container-app --resource-group nextjsContainerApp --query properties.configuration.ingress.fqdnThis command retrieves the fully qualified domain name (FQDN) of your Container App. You will use this URL to access your Next.js application.
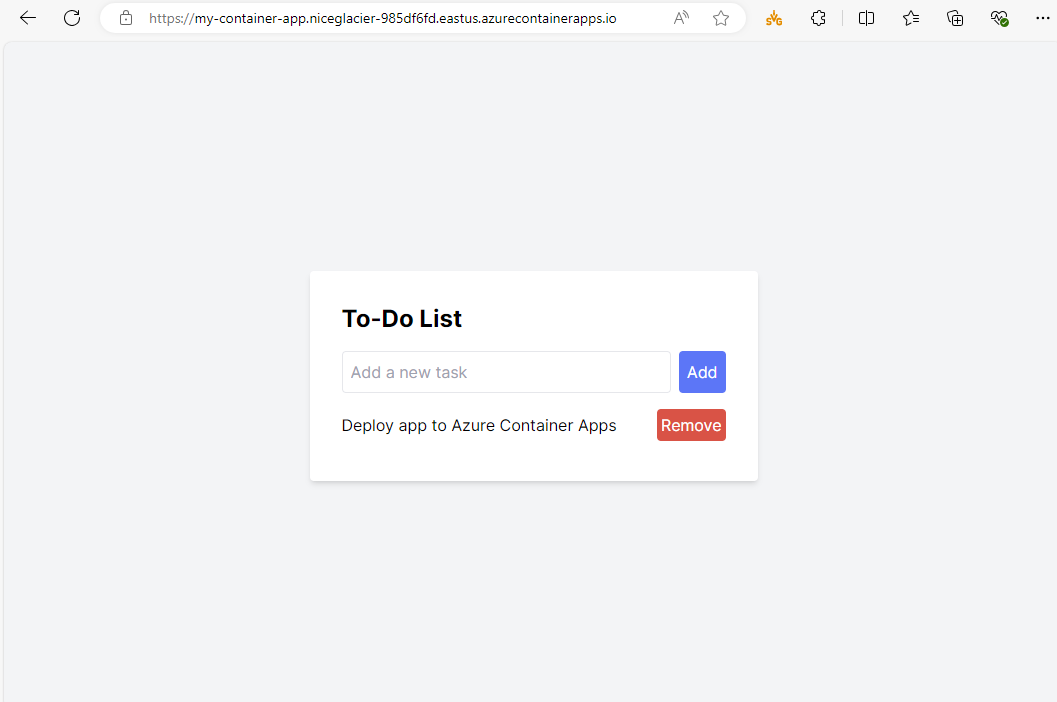
- Paste the URL in your browser to see your application running in a Container App:
Conclusion
In this guide, you walked through the entire process of deploying a Dockerized Next.js application to Azure Container Apps. Here’s a quick recap of what you covered:
- Creating a Next.js Application: You started by setting up a basic Next.js application.
- Dockerizing the Application: You then created a Dockerfile and built a Docker image of your application.
- Pushing the Docker Image to Azure Container Registry (ACR): You securely stored your Docker image in Azure Container Registry.
- Deploying the Docker Image to Azure Container Apps: Finally, you deployed the Docker image to Azure Container Apps, ensuring your application is scalable, reliable, and easy to manage.
By following these steps, you have successfully leveraged Azure’s robust cloud infrastructure to deploy a Next.js application using modern containerization practices. This setup not only simplifies the deployment process but also enhances the scalability and maintainability of your application.
Additional Resources
- For a more in-depth look at creating and deploying Docker images, refer to How to Build and Publish a Docker Image to Azure Container Registry.
- Discover best practices for writing Dockerfiles in our guide Writing Dockerfile For The First Time.
- Learn about integrating monitoring tools with your Azure apps in Monitoring and Troubleshooting Techniques in Azure Container Apps.
Discover more from Parveen Singh
Subscribe to get the latest posts sent to your email.