


Azure Static Web Apps is a service offered by Microsoft Azure that provides a seamless and efficient way to host static websites. It supports a wide range of frameworks and libraries, including React, Angular, Vue.js, Next.js, and more. With Azure Static Web Apps, you can enjoy features like continuous deployment from GitHub, custom domains, SSL certificates, and built-in authentication and authorization. The service is designed to simplify the process of deploying and managing static websites, making it an ideal choice for developers looking to leverage Azure’s robust infrastructure.
What Are Static Websites?
Static websites consist of fixed content—HTML, CSS, and JavaScript files—that is delivered to the user’s browser exactly as stored. Unlike dynamic websites, which generate content on-the-fly based on user interactions or server-side processing, static websites serve pre-rendered content that does not change unless manually updated. This simplicity results in faster load times, easier scalability, and enhanced security, making static websites ideal for personal blogs, portfolio sites, documentation, and corporate landing pages.
In this guide, you will learn how to deploy a static web app using Azure Static Web Apps, similar to how you can deploy web applications using Azure App Service. A simple Next.js project will be used as an example to demonstrate the process. By the end of this guide, you will have a fully functional static website hosted on Azure, with continuous deployment set up through GitHub.
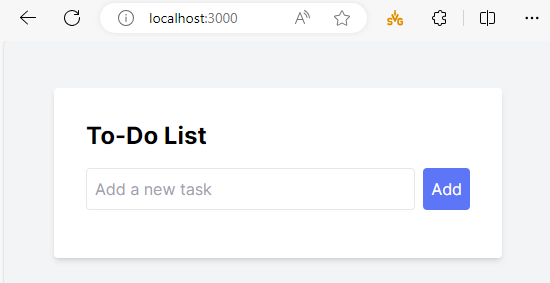
Currently, the app is running in the local environment. By the end of this guide, the app will be hosted on Azure’s Static Web Apps service, taking advantage of its powerful features to ensure a seamless deployment experience.
Setting Up Your Project Repository
Creating a New GitHub Repository
Before deploying your static web app, you need to set up a GitHub repository for your project. Follow these steps:
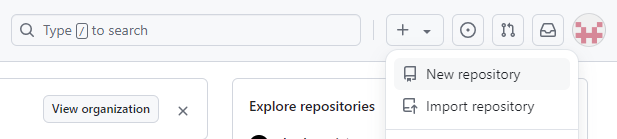
- Open Github and sign in to your account.
- Click on the (+) icon in the top-right corner and select New repository:
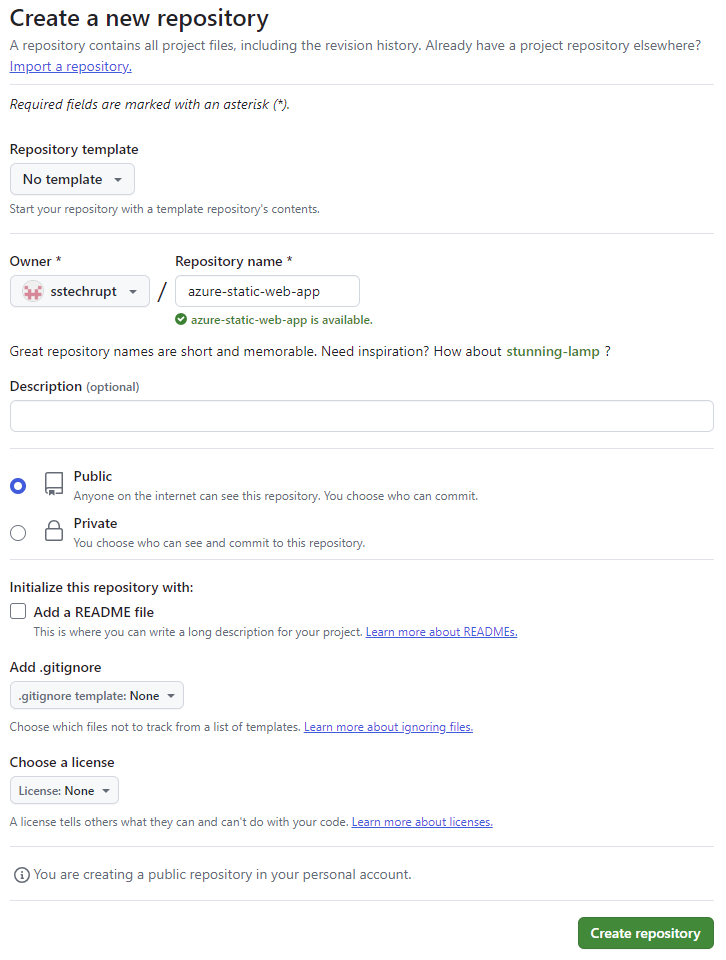
- On the Create a new repository page, fill in the following information and click Create repository:
- Repository name: Enter a name for your repository.
- Select Public or Private based on your preference.
After creating the repository, you’ll see GitHub’s quick setup instructions. These instructions provide commands to either create a new repository or push an existing project.
- On the Quick Setup page, copy the command based on your scenario.
Linking Your Project to GitHub
- Open your terminal and navigate to the root directory of your Next.js project (or any other static site project).
- Initialize your GitHub repository by using the commands you copied from GitHub quick setup instruction page:
 You may be prompted to log into your GitHub account.
This setup ensures that your project is version-controlled and ready for deployment. Continuous deployment from GitHub is one of the key features of Azure Static Web Apps. For a deeper understanding of CI/CD processes, check out this guide on Building CI-CD Pipelines using Azure DevOps. Next, you will cover how to deploy this project using Azure Static Web Apps using the the Azure Portal.
Deploying a Static Web App using Azure Portal
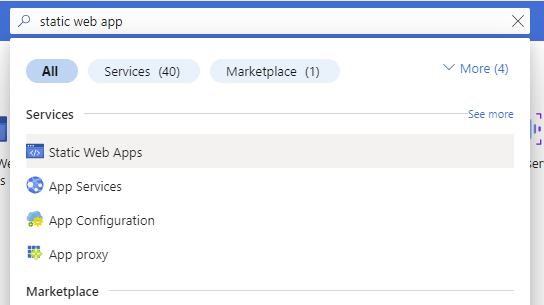
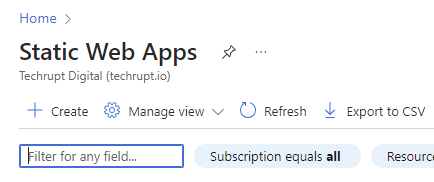
- In Azure Portal, search for Static web app and select Static Web Apps:
- On the Static Web Apps page, click on (+)Create:
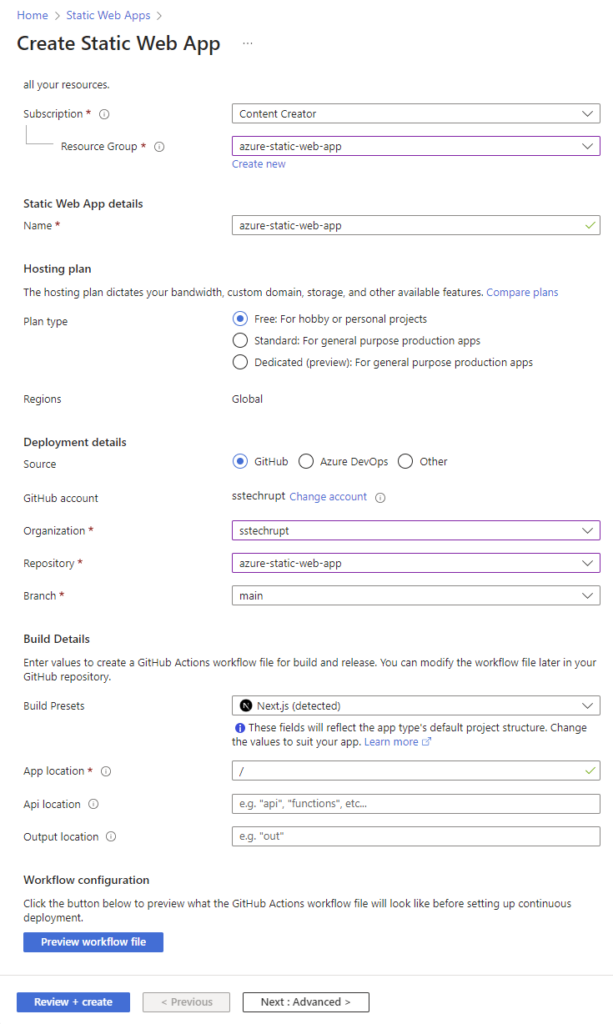
- On the Create Static Web App page, fill in the following information and click Review + create:
- Subscription: Select your Azure subscription. This specifies which Azure account will be billed for the resources.
- Resource Group: Select a resource group or create a new one. A resource group helps you manage and organize related Azure resources.
- Name: Enter a name for your Static Web App. This name should be unique within your resource group and will be used as part of the web app URL.
- Plan type: Select the appropriate plan type. Choose Free for hobby or personal projects, Standard for general production apps, or Dedicated (preview) for high-performance needs.
- Source: Select GitHub. This allows Azure to connect to your GitHub repository for continuous deployment.
- GitHub account: Ensure your GitHub account is connected. If not, click Change account to sign in to GitHub.
- Organization: Select your GitHub organization. This is the GitHub account under which your repository is located.
- Repository: Select your project repository you want to host as a static web app. This should be the repository you set up and pushed your code to earlier.
- Branch: Select your deployment branch. Typically, this is the
mainbranch, but you can choose any branch you want to deploy from. - Build Presets: Select your framework. In most cases, it will be auto-detected based on your project. This ensures that the correct build settings are applied for your framework.
- App location: Specify the location of your application code within the repository. For most Next.js projects, this is simply
/.
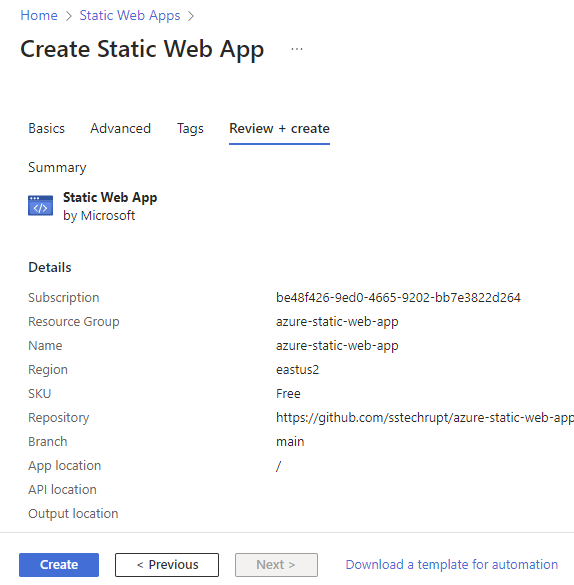
- Under the Review + create tab, click Create:
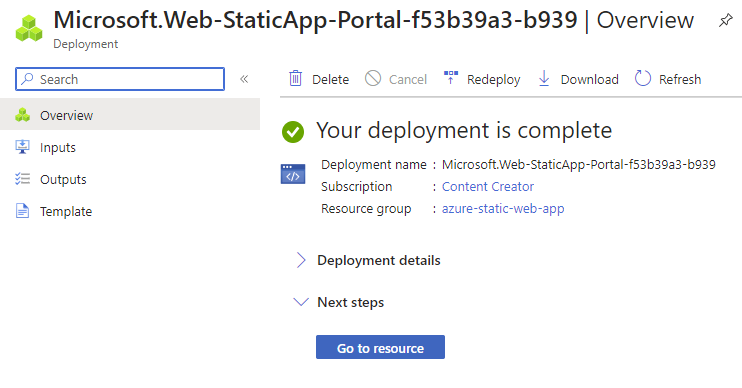
- Wait for your Static Web App resource to be deployed and click on Go to resource:
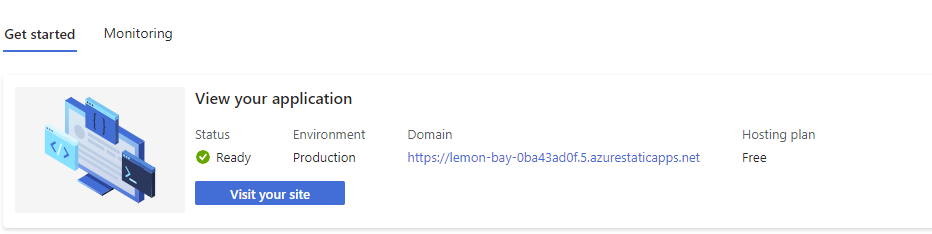
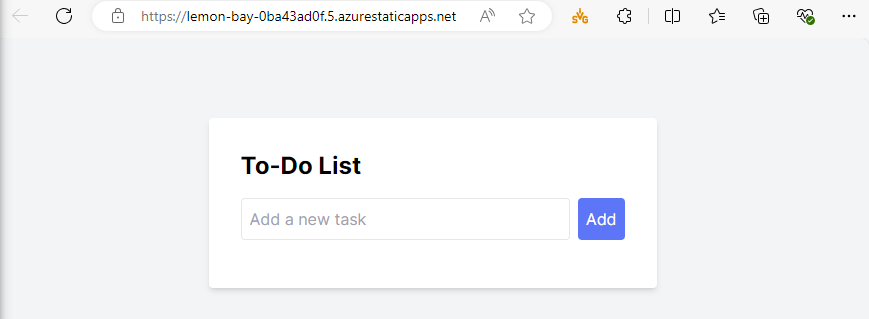
- Under the Get started tab, wait for the Status to show Ready and visit your website by clicking on the Visit your site button:
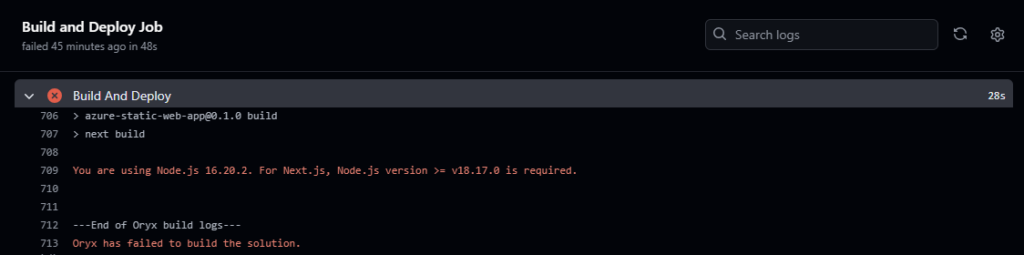
💡 If your Build and Deploy job fails and you get the following error:
💡 This error indicates that the Node.js version used in the build process is incompatible with Next.js. Next.js requires Node.js version >= v18.17.0. Add the following section to your
package.jsonfile to specify the Node.js engine:"engines": { "node": "18.17.1" }
Conclusion
By following this guide, you have successfully deployed a static web app using Azure Static Web Apps. You learned how to create a GitHub repository, link your project, and set up continuous deployment. Your Next.js application is now hosted on Azure, benefiting from fast load times, easy scalability, and enhanced security.
Additional Resources
- Azure Static Web Apps Documentation: Dive deeper into the capabilities and configurations of Azure Static Web Apps by exploring the official documentation.
- GitHub Actions Documentation: Understand how continuous integration and deployment work with GitHub Actions by reading the GitHub Actions documentation.
Advanced Topics
For further enhancement of your static web app, consider exploring the following advanced topics:
- Custom Domains and SSL: Set up custom domains and configure SSL certificates to ensure your website is secure and professional.
- Authentication and Authorization: Implement built-in authentication and authorization features to add user login functionality to your app.
- Serverless Functions: Extend the capabilities of your static web app by using Azure Functions to handle dynamic server-side logic. Learn more about setting up serverless functions in this detailed guide on Azure Function Triggers and Bindings.


